Everyone loves shortcuts, right? Of course they do! What kind of question is that?
This is a quick tip that can help beginners get their feet under them and established photographers shave time off their workflow.
A gray card.
A lot of people have not even heard of a gray card, but it is a small investment that can save a lot of hassle.
For the beginner, getting a gray card can teach how to see proper exposure and tones. A bigger gray card tends to be best for this. Kodak has an 8x10 gray card that is about $7. Or there is the Lastolite fold up EZ-Balance gray card that is about $24. The Kodak gray card works great for exposure, but won't be as useful when we talk about setting critical white balance later, so that is part of the reason to get the Lastolite.


This is the Lastolite EZ-Balance.
So, what do you do to get your exposure with a gray card? This will work best if you have your camera's metering mode set to SPOT metering. Setting spot metering is different for each camera, but for most Canon camera's, you can select it from the top of your camera.
(Image by DPInterface.)


The spot metering mode is just the circle. No brackets around it. Once you are in spot metering mode, put your gray card in the same light as your subject. Now fill your frame with the gray card. Once you are there, balance your aperture, shutter speed, and ISO until your in-camera meter reads 0.
What is happening here is that your camera is programmed to see middle gray (the same color as the gray card!) as 0. So you are using exact middle gray to set your exposure. Once you set your exposure from this gray card, you'll be set with perfect exposure, as long as the light stays the same. If the light changes, you need to re-meter from your card again.
The great things about learning exposure this way is that you can see what a good exposure looks like. You also know what OTHER tones look like when your camera is metered right. Say WHAT? Yeah, let's think about this for a second. If you have set your camera to be locked into a perfect exposure with middle gray as zero, then you can point your camera at other tones and see what the camera would meter those at. The dirt? Maybe it is -2, the subject's skin? Maybe it is +1. Maybe the sidewalk is also zero. Getting familiar with where other tones fall in relation to middle gray is very important for helping you grow beyond relying on the gray card and finding good exposures. You'll also get a good idea of what kinds of light will meter at. After a while, you'll be able to set your exposure pretty quickly based on the conditions of light that you have set so often before.
Ok, so what about using a gray card for white balance? How does that work?
This is so slick. Getting good clean skin tones can take time. When skin tones are off, you can spend a lot of time in post trying to get them right. But if you use a gray card ahead of time, you can save a lot of time.
There are two ways to set your white balance off of a gray card. The first is by setting a CUSTOM WHITE BALANCE.
Again, this is different for different cameras, so please consult your camera manual for your camera. All of them involve filling your frame (again, like above) with the neutral gray card. You then use this image as your custom white balance (choosing this shot from the menu or taking the shot while holding a button) and the camera will do the rest. Again, this white balance stays the same as long as you are in the same lighting. If you move from sun to shade or from indoors to outdoors, etc., your white balance will change and you will need to reset your white balance.
The beauty of this is that it will save you a ton of time in post. One disclaimer, sadly we find the 5D Mark III doesn't set the custom white balance quite right. It goes too orange. So we don't use this as much as we used to, and we MISS it terribly. It is our only regret about the Mark III.
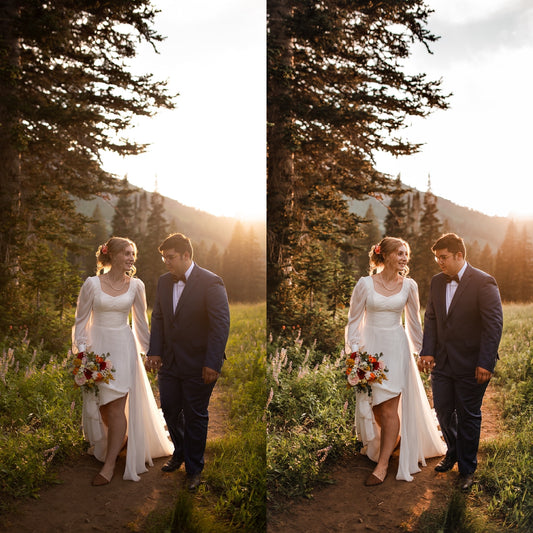
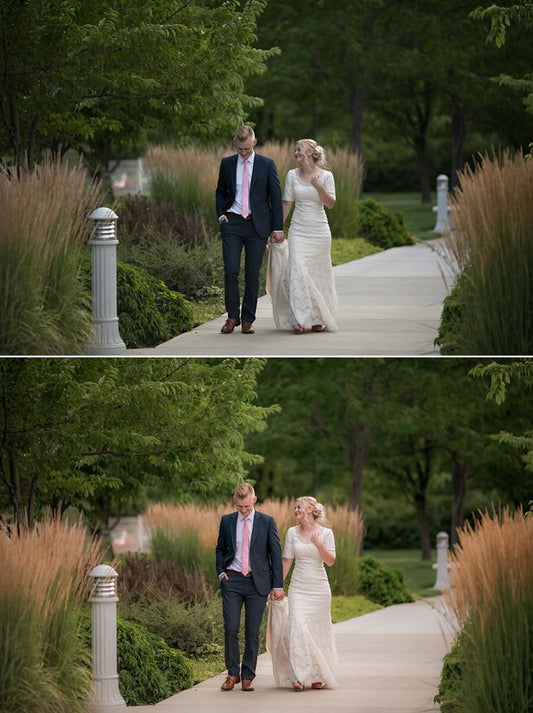
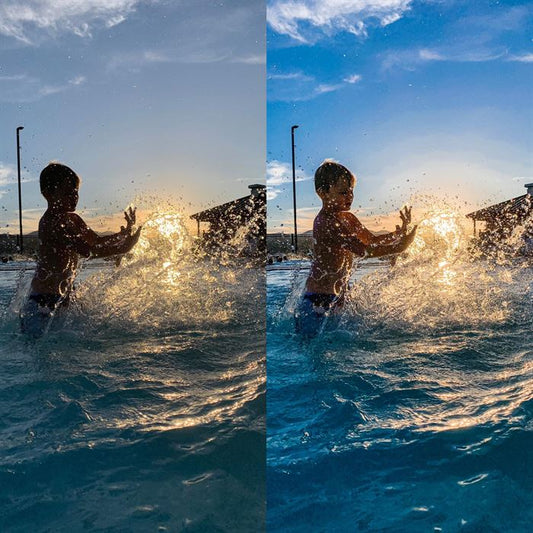
But we can use a gray card in post.
This is pretty easy.


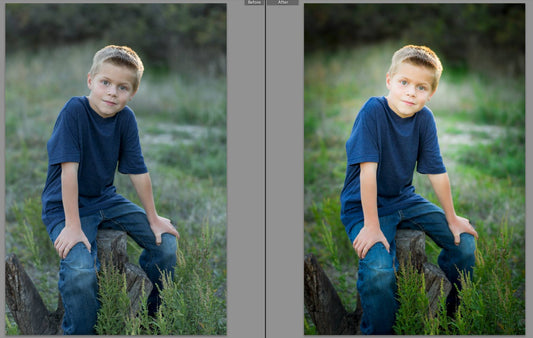
Above is the SOOC. I will click the eyedropper on the gray card of this shot.


Notice how much more neutral the neutrals are? Much warmer too.
Now, to get this edit from Lightroom to work with ALL of your images shot in the same light, you will click on this image in your filmstrip and then hold down your shift key and click on the LAST image in the same lighting in your filmstrip. Then choose the SYNC button on the bottom right (when you have multiple images chosen the Previous button will become SYNC.) Choose the White Balance tick box and choose SYNC and it will apply this White Balance to your entire series of images from the same light. Easy peasy!
This also works in Bridge and ACR.
Give a gray card a try. It is a minimal investment for a lot of time-savings.